 Save
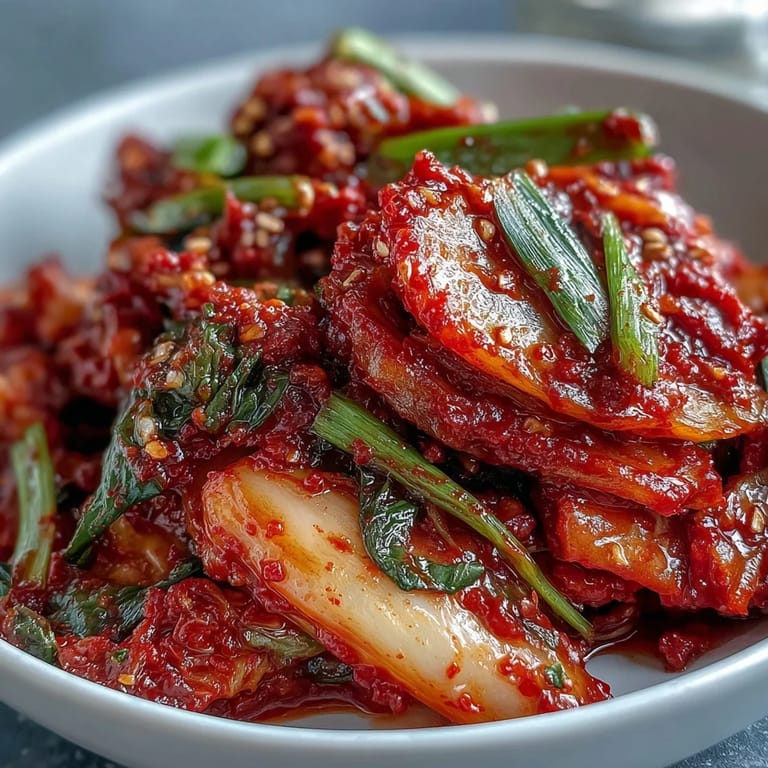
Save My neighbor's kitchen smelled like garlic and chili for three days straight, and I couldn't stop thinking about it. She finally invited me over and handed me a jar of homemade kimchi, its crimson color glowing through the glass. One bite and I understood why she made it in batches large enough to share with half the building. The crunch, the tang, the slow burn—it was nothing like the store-bought stuff I'd tried before. I asked for the recipe that same afternoon.
I made my first batch on a rainy Saturday when I had nowhere to be and nothing to prove. The kitchen counter was covered in cabbage leaves, my hands were stained red from the chili paste, and I felt like I was participating in something ancient and important. My partner walked in, sniffed the air, and asked if we were opening a restaurant. By day three, when I cracked open the jar and heard that fizzy hiss, I felt ridiculously proud. We ate it with scrambled eggs that morning and I knew I'd be making kimchi for the rest of my life.
Ingredients
- Napa cabbage: The star of the show, chosen for its tender leaves and ability to absorb brine and spice without turning to mush during fermentation.
- Coarse sea salt: Essential for drawing out moisture and beginning the fermentation magic, use coarse salt for better control and avoid iodized varieties that can interfere with good bacteria.
- Daikon radish: Adds a crisp, refreshing crunch and a slightly peppery bite that balances the cabbage's sweetness.
- Gochugaru (Korean red chili flakes): The soul of kimchi, offering vibrant color and a smoky, fruity heat that builds slowly rather than smacking you in the face.
- Garlic and ginger: The aromatic backbone that gives kimchi its unmistakable pungency and depth, don't skimp on these.
- Fish sauce: Brings a deep umami richness that makes the whole batch sing, swap for soy sauce if you're keeping it vegan.
- Rice flour: Mixed with water to create a porridge that helps the spice paste cling to every leaf and encourages even fermentation.
- Scallions and carrot: Optional but recommended for added color, sweetness, and textural variety in every bite.
Tired of Takeout? 🥡
Get 10 meals you can make faster than delivery arrives. Seriously.
One email. No spam. Unsubscribe anytime.
Instructions
- Prep the cabbage:
- Quarter the napa cabbage lengthwise and chop it into two-inch pieces so each bite has the perfect ratio of leafy greens to crunchy stem. This size also makes it easier to pack into jars later.
- Brine the cabbage:
- Dissolve the sea salt in cold water and submerge the cabbage pieces, weighing them down with a plate to keep them under the brine. Toss every thirty minutes for two hours until the leaves are wilted and pleasantly salty.
- Rinse and drain:
- Rinse the salted cabbage under cold running water at least two or three times to wash away excess salt, then drain thoroughly in a colander. You want it seasoned, not overly salty.
- Make the rice paste:
- Whisk rice flour and water in a small saucepan over medium heat, stirring constantly until it thickens into a translucent porridge. Let it cool completely before adding it to the spice blend.
- Blend the spice paste:
- Combine the cooled rice paste with garlic, ginger, onion, fish sauce, and sugar in a blender until smooth, then stir in the gochugaru to your preferred spice level. Taste it and adjust, this is your chance to make it yours.
- Mix everything together:
- Toss the drained cabbage with daikon, carrot, and scallions in a large bowl, then add the spice paste and massage it in with gloved hands. Work it into every crevice until the vegetables are coated in that gorgeous red paste.
- Pack the jars:
- Press the kimchi tightly into clean glass jars, pushing down firmly to eliminate air pockets and leaving about an inch of headspace at the top. The brine will rise as fermentation begins.
- Ferment at room temperature:
- Seal the jars and leave them on the counter out of direct sunlight for one to two days, opening them once daily to release built-up gas. You'll hear a satisfying hiss each time.
- Taste and refrigerate:
- After forty-eight hours, taste a piece and if it's tangy and lightly fizzy, move it to the fridge where it will continue to develop deeper, funkier flavors over the coming weeks.
 Save
Save The first time I served homemade kimchi at a dinner party, a friend who'd lived in Seoul for a year took one bite and got quiet. She looked up at me with genuine surprise and said it tasted just like what her host family used to make. That moment made all the chopping and waiting and jar burping worth it. Kimchi isn't just food, it's a conversation starter, a tradition you can hold in your hands, and a small miracle happening quietly in your fridge.
Adjusting the Heat
If you're new to gochugaru or cooking for people with varying spice tolerances, start with three tablespoons and work your way up in future batches. I once added five tablespoons for a friend who claimed to love extreme heat, and even he admitted it was borderline painful. You can always add grated apple or Asian pear to the spice paste to mellow the burn while adding a subtle sweetness that complements the garlic. The fruit also speeds up fermentation slightly, so keep an eye on it.
Storage and Shelf Life
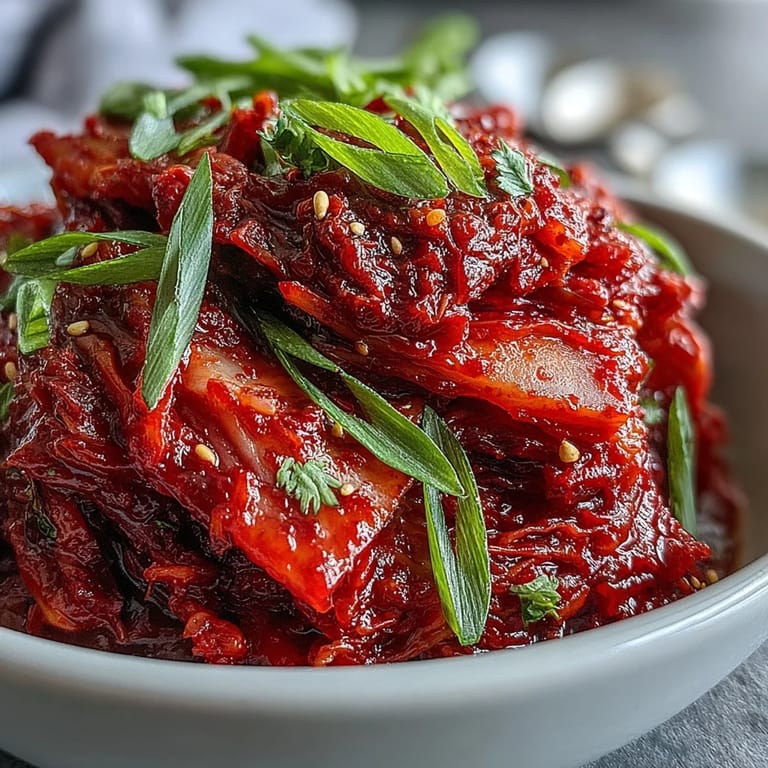
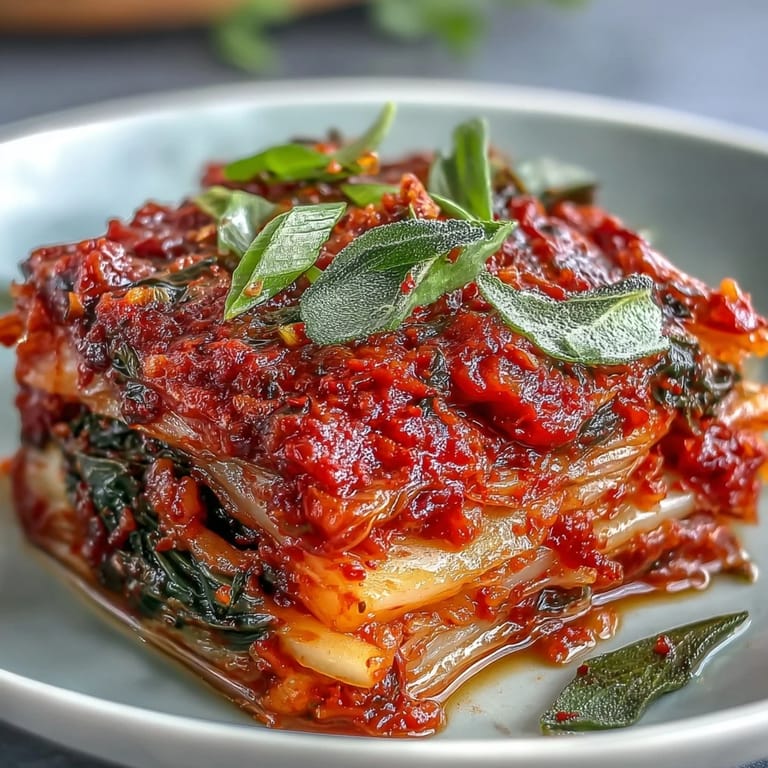
Kimchi keeps in the fridge for months, slowly transforming from bright and crunchy to deeper and softer as time passes. I've had jars that were still delicious after three months, though they do get more sour and funky the longer they sit. If you see a thin layer of white yeast on top, don't panic, just scrape it off and the kimchi underneath is perfectly fine. Press the vegetables down under the brine after each use to minimize exposure to air and keep everything tasting fresh.
Serving Suggestions
I eat kimchi straight from the jar as a snack, but it also shines when tucked into grilled cheese, stirred into ramen, or piled on top of rice bowls with a fried egg. My favorite way is chopping it roughly and folding it into savory pancakes with a bit of the brine for extra tang. It pairs beautifully with fatty pork, cuts through rich stews, and even works as a burger topping if you're feeling adventurous.
- Serve it cold alongside steamed rice and grilled meats for a traditional Korean meal.
- Chop it finely and mix it into fried rice or stir fries for instant umami depth.
- Use the brine as a marinade or salad dressing, it's too flavorful to waste.
 Save
Save There's something deeply satisfying about making food that gets better with time, that bubbles and shifts and becomes something new while you sleep. Kimchi taught me patience, and now my fridge is never without at least one jar glowing red and ready to transform whatever I'm cooking.
Recipe Help & FAQs
- → How long does kimchi need to ferment?
Fermentation takes 1–7 days depending on room temperature and taste preference. Taste after 48 hours; once sufficiently sour and tangy, transfer to the refrigerator where it will continue developing flavor slowly over several weeks.
- → Can I make kimchi without fish sauce?
Yes. Replace fish sauce with soy sauce or vegan fish sauce to create a vegan version. The umami depth will shift slightly, but the result remains delicious and authentic. Always use gluten-free soy sauce if needed.
- → Why does my kimchi jar need burping?
During fermentation, beneficial bacteria produce carbon dioxide gas. Opening jars daily for 1–2 days releases excess pressure, preventing jar lids from popping and allowing proper fermentation to occur safely.
- → What temperature is best for fermentation?
Room temperature (65–72°F / 18–22°C) is ideal. Keep jars away from direct sunlight and drafts. Cooler temperatures slow fermentation and develop flavor more gradually, while warmer conditions speed up the process.
- → How should I store finished kimchi?
Transfer sealed jars to the refrigerator once the desired tanginess is reached. Kimchi keeps for several months when properly stored in clean, airtight containers. The cold slows fermentation significantly while flavors continue to mature.
- → Can I adjust the spice level?
Absolutely. Use less gochugaru for milder heat, or add grated apple or pear to the spice paste for subtle sweetness that balances spice. Start conservative and adjust future batches based on your heat preference.