 Save
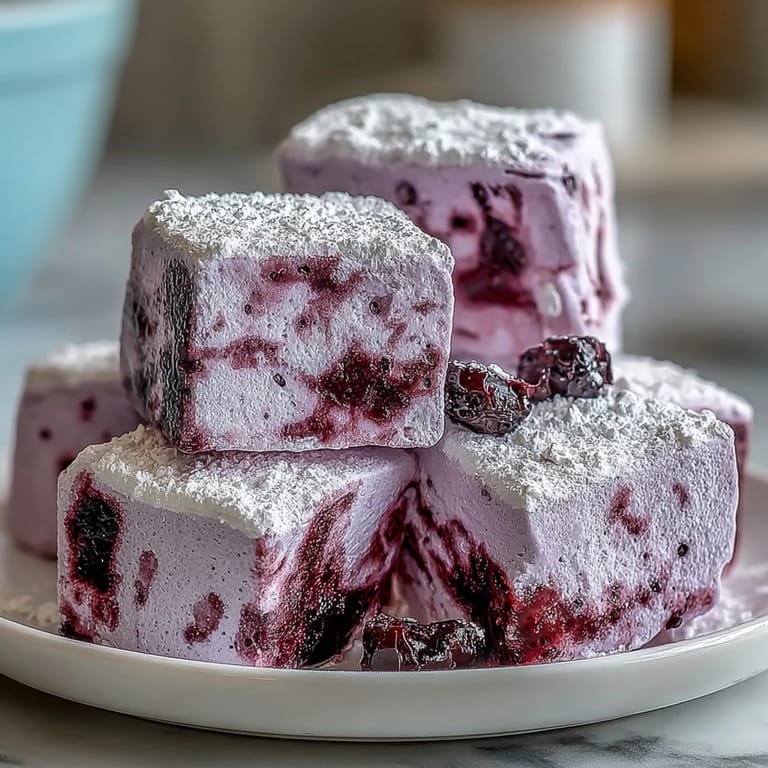
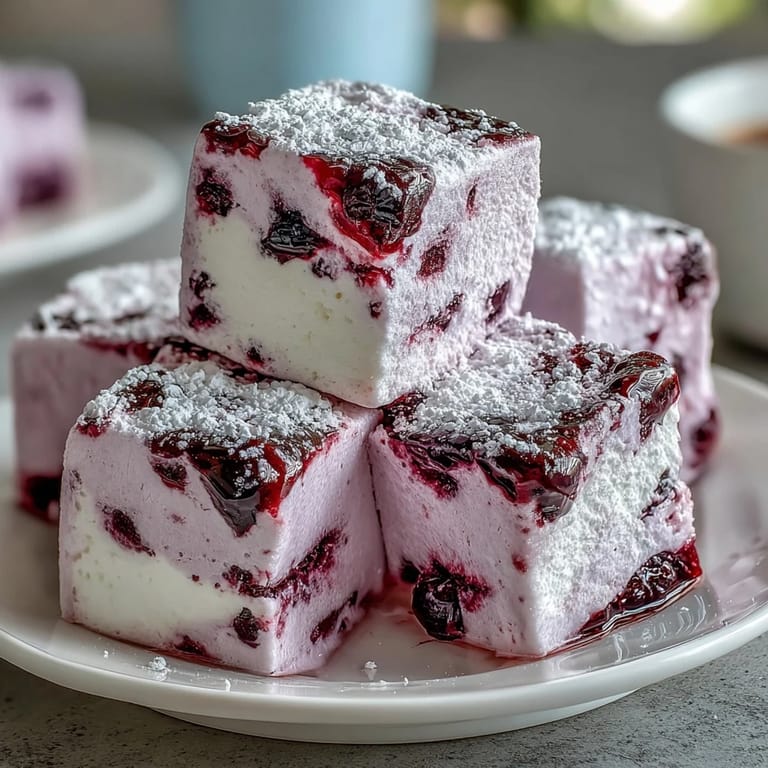
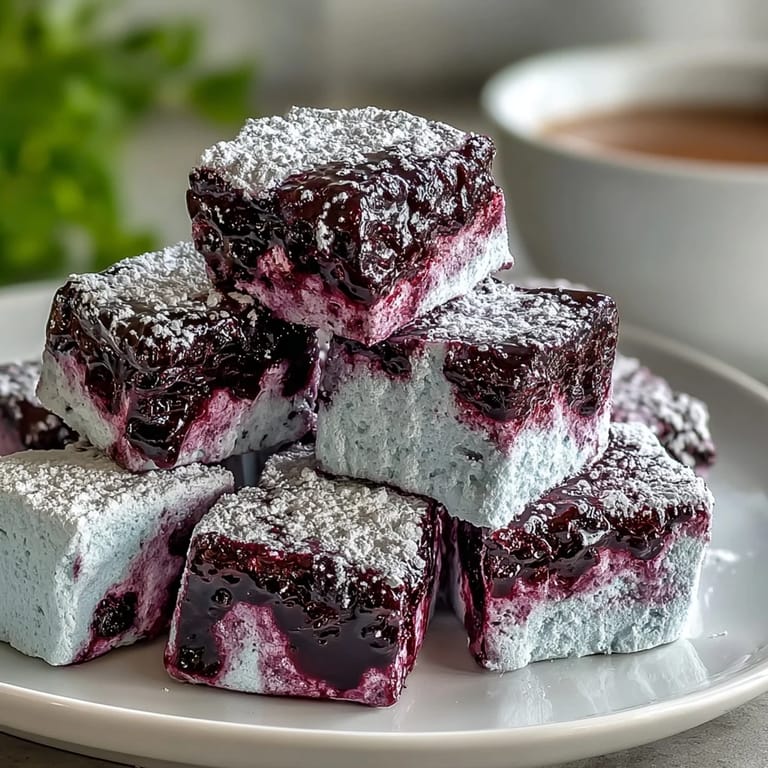
Save There's something magical about watching marshmallows transform in a stand mixer—the way they go from a thin, glossy syrup to this cloud-like mass that practically doubles before your eyes. I discovered blackcurrant marshmallows quite by accident one autumn when a friend brought a jar of homemade blackcurrant purée to my kitchen, and I was too curious not to experiment. The tart berry flavor cuts through the sweetness in a way that feels both nostalgic and entirely new, like biting into something that shouldn't work but somehow tastes like it was always meant to be this way.
I made these for a dinner party last winter, and honestly, I was nervous about serving homemade marshmallows to people who might expect something restaurant-quality. But when my neighbor broke off a piece and closed her eyes, I knew they were going to be fine—better than fine, actually. The conversation shifted entirely; everyone wanted to know how I'd made them, and suddenly the marshmallows became the reason people remembered the evening, not the main course.
Ingredients
- Blackcurrant Purée: Fresh or frozen blackcurrants blended smooth and strained create that signature tart brightness—don't skip the straining step or you'll have a grainy texture.
- Powdered Unflavored Gelatin: This is your marshmallow's skeleton; it gives the mixture its characteristic bounce and holds everything together as it sets.
- Granulated Sugar: Combined with corn syrup, it creates that glossy, sticky base that whips into clouds when you add the hot syrup.
- Light Corn Syrup: This prevents crystallization and keeps your marshmallows tender rather than grainy, which I learned the hard way.
- Candy Thermometer: Honestly, don't estimate the temperature here—240°F is the magic number where everything comes together perfectly.
- Confectioners Sugar & Cornstarch Mixture: This dusting keeps marshmallows from sticking together and adds a subtle sweetness when you bite into them.
Tired of Takeout? 🥡
Get 10 meals you can make faster than delivery arrives. Seriously.
One email. No spam. Unsubscribe anytime.
Instructions
- Prepare Your Canvas:
- Line an 8x8 inch baking pan with parchment paper and dust it generously with the confectioners sugar and cornstarch blend. This step feels almost ceremonial—you're creating a stage for the marshmallows to set perfectly without sticking.
- Cook Down the Blackcurrants:
- Combine your purée with water and a bit of sugar, then let it simmer gently for 4 to 5 minutes until it's slightly thickened and deepened in color. The kitchen will smell incredible—almost jammy and bright at the same time.
- Bloom the Gelatin:
- Sprinkle the gelatin over cold water in your mixer bowl and let it sit untouched for 10 minutes. This gives the gelatin time to absorb the water and become spongy, which is essential for getting that cloud-like texture later.
- Craft the Syrup:
- In a saucepan, combine sugar, corn syrup, and water, then heat it over medium-high until the sugar dissolves completely. Insert your candy thermometer and watch as it climbs to exactly 240°F—this temperature is non-negotiable.
- The Transformation Begins:
- With your mixer running on low, pour the hot syrup slowly into the bloomed gelatin while it mixes. The sound and smell change instantly; it's like watching alchemy happen in real time.
- Whip to Fluff:
- Crank the mixer to high speed and let it run for 6 to 8 minutes until the mixture is thick, glossy, and has tripled in volume. You'll see it change from a pale liquid to something that looks like shaving cream.
- Add the Berry Essence:
- Fold in the salt, vanilla extract, and your cooled blackcurrant purée with just another minute of mixing. The marshmallow will shift to a soft lavender hue that's almost too pretty to cut into.
- Pour and Settle:
- Immediately pour the mixture into your prepared pan and smooth it with a spatula—speed matters here because the mixture will start to set quickly. Sift that sugar-cornstarch mixture generously over the top right away.
- The Patient Wait:
- Leave the pan uncovered at room temperature for at least 4 hours, though overnight is even better. This is when the magic of structure happens, and you'll be tempted to peek constantly.
- Release and Cut:
- Turn the entire slab onto a cutting board, peel away the parchment, and dust all exposed sides with more of that sugar mixture. Use a sharp knife (also dusted) to cut clean squares—the dusting on the blade prevents sticking.
 Save
Save These marshmallows turned into a tradition at my house without me planning it that way. Now every time someone visits, they ask if I've made a batch, and I find myself dusting off the stand mixer more often than I expected to.
Flavor Variations Worth Trying
Once you understand how this recipe works, you realize you're not really locked into blackcurrants at all. I've experimented with raspberry, which gives a slightly softer tartness, and blackberry, which adds an almost earthy complexity. The formula stays exactly the same—just swap the purée—and suddenly you're inventing new flavors instead of following instructions.
Storing Your Marshmallows Properly
An airtight container is truly non-negotiable here; humidity is your enemy and will turn your beautiful marshmallows into a sticky, deflated mess within days. I learned this after leaving a batch in a paper box during a humid week and having to toss the entire thing. Keep them sealed tight, away from moisture, and they'll stay fluffy and fresh for a full week.
Making This Recipe Feel Special
Homemade marshmallows deserve to be treated like the small luxury they are, so package them beautifully if you're gifting them. I dust them extra generously with a mixture of confectioners sugar and a tiny pinch of freeze-dried berry powder—it looks stunning and tastes like intentionality. These are the kind of treats that make people feel genuinely cared for, not because they're difficult, but because you took the time to make something nobody else bothers with anymore.
- Pair them with dark chocolate or drop them into hot cocoa for pure comfort.
- A swirl of extra blackcurrant purée before they set adds beautiful color and extra tartness if you're brave.
- Store any dusting mixture you have left—you'll use it again next time, and there will definitely be a next time.
 Save
Save There's real joy in pulling a tray of homemade marshmallows from the kitchen, knowing you made something that tastes like care and tastes nothing like what you find in the candy aisle. Once you've done this, you'll understand why people talk about homemade food the way they do.
Recipe Help & FAQs
- → What makes these marshmallows different from traditional ones?
These marshmallows feature reduced blackcurrant purée swirled into the whipped mixture, creating a beautiful lavender hue and adding tart, fruity notes that contrast perfectly with the sweet vanilla base.
- → How long do the marshmallows need to set?
The marshmallow mixture requires at least 4 hours at room temperature to fully set. This resting period allows the gelatin to firm completely, making them easy to cut into neat squares.
- → Can I substitute the blackcurrant purée with other fruits?
Absolutely. Blackberry, raspberry, or cherry purée work wonderfully as alternatives. Each fruit will create a different color profile and flavor intensity while maintaining the same fluffy texture.
- → Do I need a candy thermometer for this?
Yes, reaching exactly 240°F (115°C) is crucial for proper marshmallow structure. Without precise temperature control, the final texture may be too soft or too dense.
- → How should I store these marshmallows?
Keep them in an airtight container at room temperature for up to one week. The dusting mixture prevents sticking, while the sealed container maintains freshness and prevents them from drying out.
- → Can I make these vegetarian or vegan?
This version uses traditional gelatin, so it's not suitable for vegetarians. To make vegan marshmallows, substitute with agar-agar, though the texture and setting time will differ from the gelatin version.