 Save
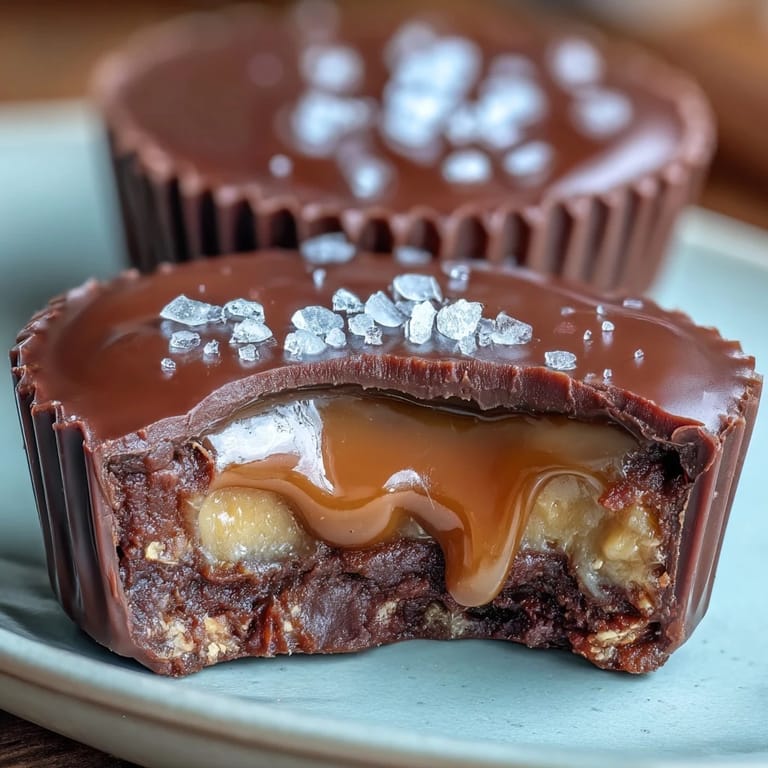
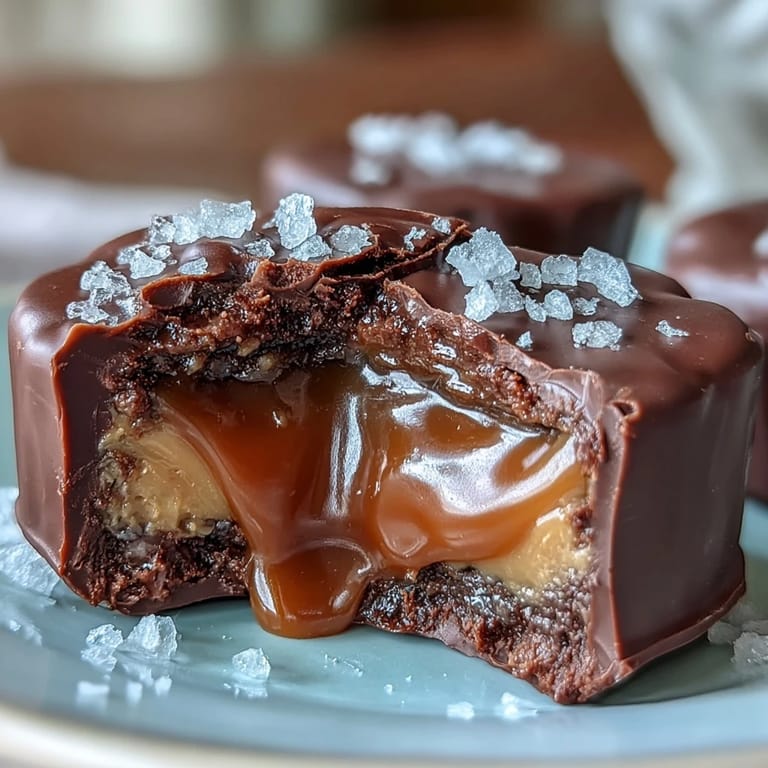
Save There's something magical about the moment when homemade peanut butter cups crack between your teeth, and that salted caramel floods out like liquid gold. I discovered this version while experimenting one rainy afternoon, trying to recreate the fancy chocolates my neighbor brought back from her trip, but with more interesting layers and a serious caramel situation. The sea salt on top was actually an accident—I knocked the cellar salt over while reaching for something else—but it changed everything about how the flavors landed on my tongue. Now I make these whenever I want to impress people without spending half my paycheck, or honestly, just when I need to eat three in a row while watching a movie.
I'll never forget my sister's face when she bit into one of these for the first time—she literally paused mid-chew like she was trying to figure out if it was real. We were sitting at my kitchen counter with coffee, and she immediately asked for the recipe, which of course meant I had to make another batch by the weekend because she'd already told all her friends. That's when I realized these weren't just treats; they were conversation starters.
Ingredients
- Semisweet or milk chocolate, 300 g (10 oz), chopped or chips: This is your base, so quality matters more than you'd think—the better the chocolate, the richer your cups will taste, and chips melt more evenly than chunks.
- Coconut oil or unsalted butter, 2 tbsp: This keeps your chocolate smooth and pourable; coconut oil gives a slightly lighter finish while butter adds richness.
- Creamy peanut butter, 120 g (½ cup): Use the kind without added oils if you can find it, as it holds its shape better when chilled.
- Powdered sugar, 2 tbsp: This sweetens the peanut butter layer without making it grainy or loose.
- Unsalted butter, 1 tbsp (softened) for filling: Softened means it blends smoothly with the peanut butter without lumps.
- Vanilla extract, ½ tsp: A small amount elevates the peanut butter flavor without being obvious about it.
- Granulated sugar, 100 g (½ cup) for caramel: This becomes liquid gold when you stop stirring and just let the heat do its thing.
- Unsalted butter, 2 tbsp for caramel: Keep this separate from your filling butter—it adds richness to the caramel once the sugar melts.
- Heavy cream, 60 ml (¼ cup): This is what makes your caramel silky instead of grainy, but add it slowly because it will absolutely bubble up on you.
- Fine sea salt, ¼ tsp for caramel: This dissolves into the caramel and enhances every flavor without tasting salty.
- Flaky sea salt, for sprinkling: This is your finishing touch—use the good stuff with visible crystals that melt on your tongue.
Tired of Takeout? 🥡
Get 10 meals you can make faster than delivery arrives. Seriously.
One email. No spam. Unsubscribe anytime.
Instructions
- Line and prep your workspace:
- Fit your muffin tin with 12 paper liners, and make sure you have a clear spot in your freezer because you'll need it twice during this process.
- Melt the chocolate gently:
- Place your chopped chocolate and coconut oil in a heatproof bowl over a pot of barely simmering water, stirring occasionally until it's perfectly smooth and glossy. If you're using a microwave instead, do it in 30-second bursts and stir between each one to avoid burning.
- Create the chocolate base:
- Spoon about 1 tablespoon of melted chocolate into each liner and tilt the muffin tin so the chocolate coats the bottom evenly—don't worry about the sides yet. Pop the tin into the freezer for exactly 10 minutes; you want it firm but not rock hard.
- Mix the peanut butter filling:
- In a bowl, combine your softened peanut butter, powdered sugar, soft butter, and vanilla, stirring until it's completely smooth with no streaks. Divide the mixture into 12 portions and gently flatten each one into a disc that's about the size of a walnut.
- Make the salted caramel:
- Pour your granulated sugar into a saucepan over medium heat and don't touch it—seriously, just let it melt and swirl the pan occasionally until it's golden amber. Once it's there, add your 2 tablespoons of butter and stir until melted, then slowly pour in the heavy cream while whisking constantly because it will bubble and hiss dramatically. After it smooths out, remove it from heat, stir in the fine sea salt, and let it cool for about 10 minutes until it thickens slightly.
- Layer the fillings:
- Take your chilled chocolate bases out of the freezer and place a peanut butter disc onto each one, pressing gently so it stays put. Spoon about 1 teaspoon of cooled caramel on top of each disc, spreading it slightly with the back of your spoon.
- Seal with the top chocolate layer:
- Reheat your remaining melted chocolate if it's gotten thick, then spoon it over each filling, using the back of your spoon to smooth the tops into neat little domes. The chocolate will seal everything together.
- Add the finishing flourish:
- While the chocolate is still soft, sprinkle a pinch of flaky sea salt on each cup—not too much, just enough so you see the crystals and taste them in the first bite.
- Final chill:
- Place the entire tin in the refrigerator for at least 30 minutes until everything is completely set and firm to the touch. Once they're solid, pop them out of the liners and store them in an airtight container in the fridge for up to a week.
 Save
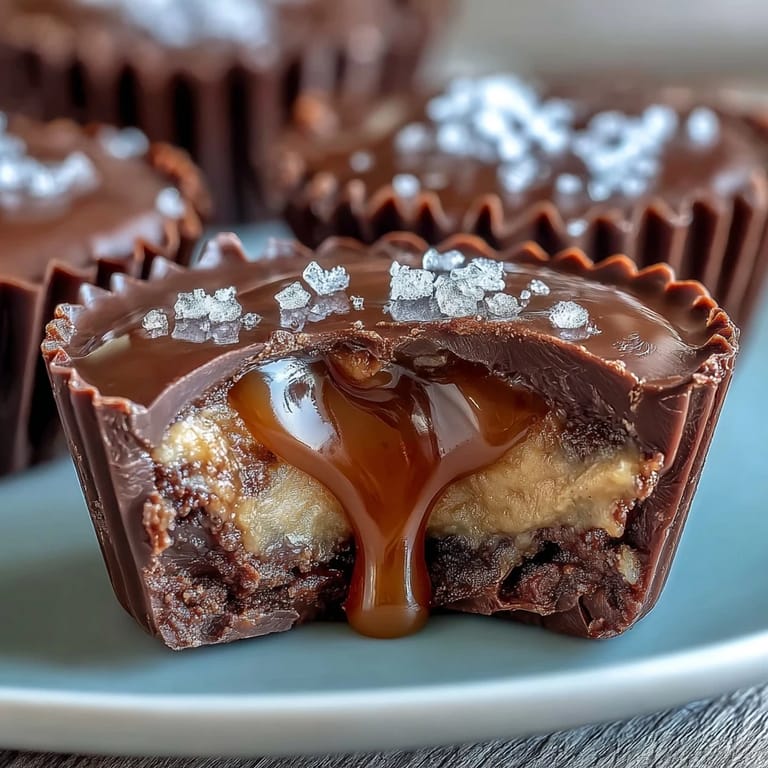
Save These cups have a way of becoming gifts you give to people, and somehow that makes them taste even better than when you're eating them alone. I've watched people's entire expression change when they bite through that chocolate into the caramel, and it reminds me why spending an hour in the kitchen is worth it.
The Caramel Question
Homemade caramel intimidates a lot of people, but honestly it's just sugar that's had a really good time over heat. The key is resisting the urge to stir it obsessively—I learned this by making a batch that crystallized into a sad, grainy mess while my friend watched from across the kitchen. Now I tell everyone: swirl the pan gently, watch it change color, and the moment it goes golden amber, add your butter and cream. It takes maybe five minutes total, and the difference between homemade and store-bought is absolutely night and day.
Customizing Your Cups
Once you understand the basic formula, you can play around with the flavors in ways that make these entirely your own. I've made versions with almond butter instead of peanut, and they're equally amazing—the caramel doesn't care what nut butter is underneath it. One time I added a pinch of cinnamon to the caramel because I was cooking with fall on the brain, and suddenly I had something that tasted like a sophisticated spiced treat instead of just candy.
Storage and Serving
These need to live in the refrigerator or they'll get soft and lose their shape, which is fine if you like eating warm peanut butter cups, but less fine if you want them to stay neat in a box. They keep for a full week if you store them in an airtight container, and honestly they're the perfect grab-one-on-your-way-out-the-door breakfast treat if nobody's judging you before 9 am.
- Let them sit at room temperature for just two minutes before eating if you want them slightly softer than fridge-cold.
- If they crack or break, just eat them immediately as punishment for not keeping them cold enough.
- Make double batches because once people know you can make these, you'll be making them constantly.
 Save
Save There's something deeply satisfying about making candy at home, especially when it turns out better than anything you could buy. Make these, eat one, and immediately understand why your friends will keep asking for them.
Recipe Help & FAQs
- → What type of chocolate works best?
Semisweet or milk chocolate is ideal for a balanced sweetness and smooth texture, but dark chocolate can be used for a richer taste.
- → Can I substitute the peanut butter?
Yes, almond butter or sunflower seed butter are good alternatives for a nut-free or different flavor profile.
- → How should I store these cups?
Store in an airtight container in the refrigerator to maintain firmness and freshness for up to one week.
- → Why add sea salt on top?
Flaky sea salt enhances the flavors by adding a crunchy texture and balancing the sweetness with a savory note.
- → Can I prepare these in advance?
Yes, they can be made ahead and chilled for at least 30 minutes before serving, making them convenient for gatherings.
- → What is the best way to melt the chocolate?
Melt chocolate gently over simmering water or in short bursts in a microwave to avoid burning or seizing.