 Save
Save The first time I watched my grandmother make knafeh, I was mesmerized by the sound of it hitting the hot oil—a sharp, immediate sizzle that meant something magical was about to happen. She'd spent hours soaking the Akawi cheese, changing the water with the patience of someone who understood that shortcuts never tasted as good. When she pulled it from the oven, golden and crackling, she didn't hesitate before flipping it onto the platter in one confident motion. I asked her how she knew it wouldn't break apart, and she just smiled, pouring that fragrant syrup over the top like she was anointing something sacred. That moment taught me that knafeh isn't just dessert—it's theater, tradition, and comfort all wrapped in crispy phyllo.
I made this for my cousin's engagement party last spring, and watching people's faces light up when they took the first bite reminded me why this dessert has survived centuries of tradition. Someone asked if they could have the recipe, and I realized I'd made something worth passing down, not just something that tasted good. That's when knafeh stopped being just a dish I made and became part of how I show love to the people around me.
Ingredients
- Akawi cheese: This is the heart of knafeh—mild, salty, and stretchy when melted. If you can't find it, low-moisture mozzarella works, though you'll lose a bit of that authentic tang.
- Ricotta cheese: Adds creaminess and keeps the filling from being too heavy or bouncy.
- Kataifi pastry: Those delicate shredded strands become incredibly crispy when baked with butter. Thaw it gently so the strands don't clump together.
- Unsalted butter: This coats every strand and turns them golden. Don't skip the melting step—it needs to reach every corner.
- Sugar and water: The base of your syrup, simple and essential for that sticky-sweet coating.
- Lemon juice: A whisper of tartness that balances the sweetness and keeps the syrup from feeling cloying.
- Orange blossom and rose water: These are what make knafeh unmistakable. They're floral without being perfumey, if you use a light hand.
- Pistachios: The final flourish of color and a gentle crunch that plays beautifully against everything else.
Tired of Takeout? 🥡
Get 10 meals you can make faster than delivery arrives. Seriously.
One email. No spam. Unsubscribe anytime.
Instructions
- Start with your oven and cheese:
- Preheat to 180°C (350°F) while you tackle the cheese soaking. This isn't just tradition—it actually removes the salt that would overpower the filling. If you're using Akawi, start this the night before or at least several hours ahead, changing the water every hour or so until it runs clear.
- Mix your cheese filling:
- Once your Akawi (or mozzarella) is drained and patted dry, shred or slice it thinly so it melts evenly. Combine it with the ricotta in a bowl and let it sit while you prepare the pastry.
- Butter your kataifi strands:
- Place the thawed pastry in a large bowl and gently separate the strands with your fingers—think of it like loosening tangled hair, not ripping it apart. Pour the melted butter over everything and mix until each strand is coated. You want even coverage so it all crisps at the same rate.
- Build your base layer:
- Grease your baking dish with a little extra butter, then spread half the buttered kataifi evenly across the bottom. Press down gently to create a solid base—it should feel like you're tucking it in, not compacting it into cement.
- Add the cheese:
- Spread your cheese mixture evenly over the kataifi layer. Don't be timid—you want good cheese coverage in every bite, but try to keep it contained so it doesn't leak out the sides.
- Top with the remaining pastry:
- Carefully spread the rest of the buttered kataifi over the cheese, gently pressing down so it holds together but stays light and crispy. This is what will turn golden and give you that crackling texture.
- Bake until golden:
- Bake for 30–35 minutes until the top is deep golden brown and you can hear it crackling slightly when you move the pan. The color is your guide—too light and it won't be crispy, too dark and the butter will taste burnt.
- Make your syrup while it bakes:
- In a saucepan, combine sugar, water, and lemon juice. Bring it to a boil, then lower the heat and let it simmer gently for 8–10 minutes—you're looking for it to thicken just slightly, not turn to caramel. Remove from heat, stir in the orange blossom and rose water, and let it cool completely. This matters because pouring hot syrup onto hot phyllo can make it soggy.
- The dramatic flip:
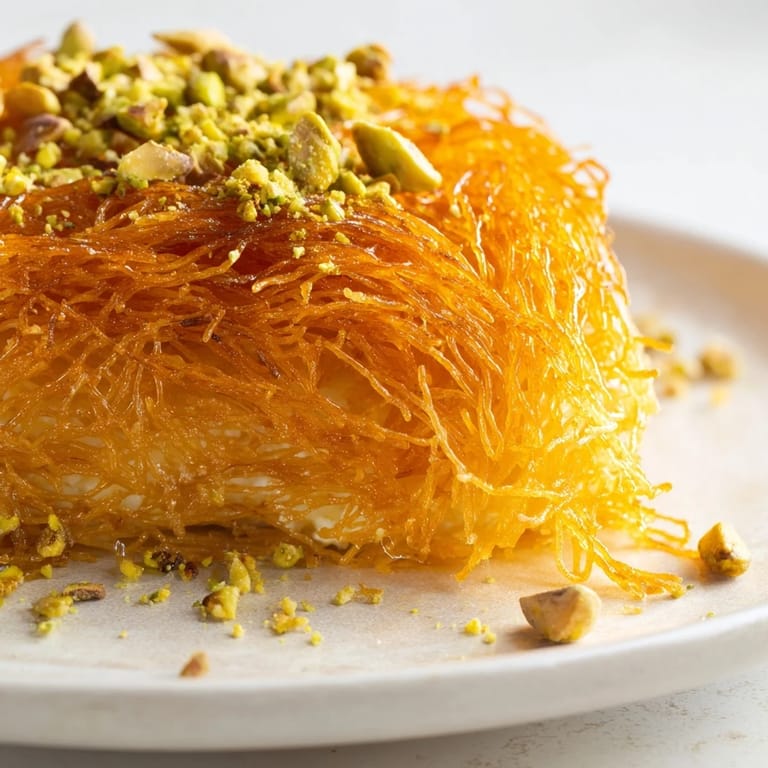
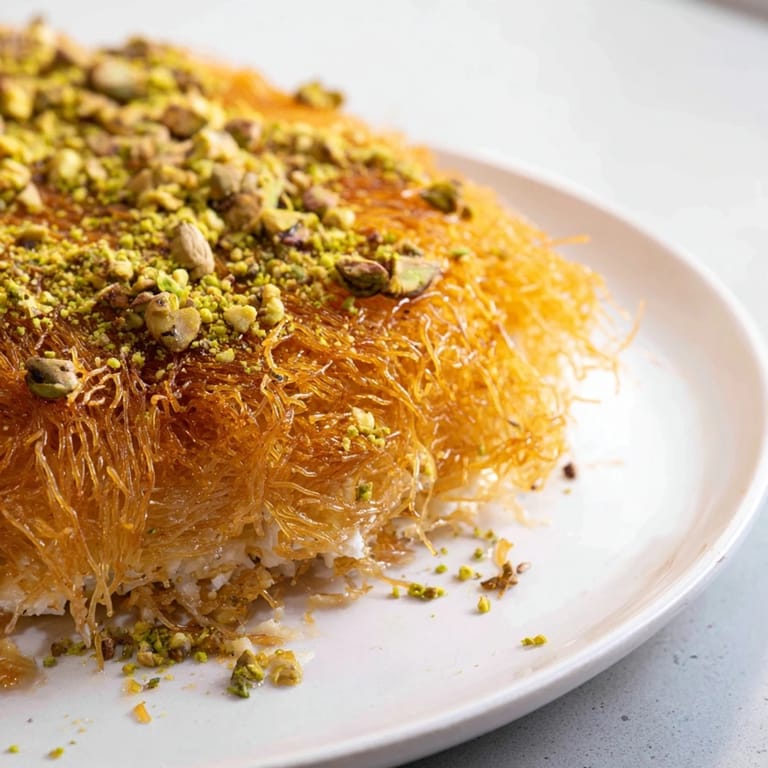
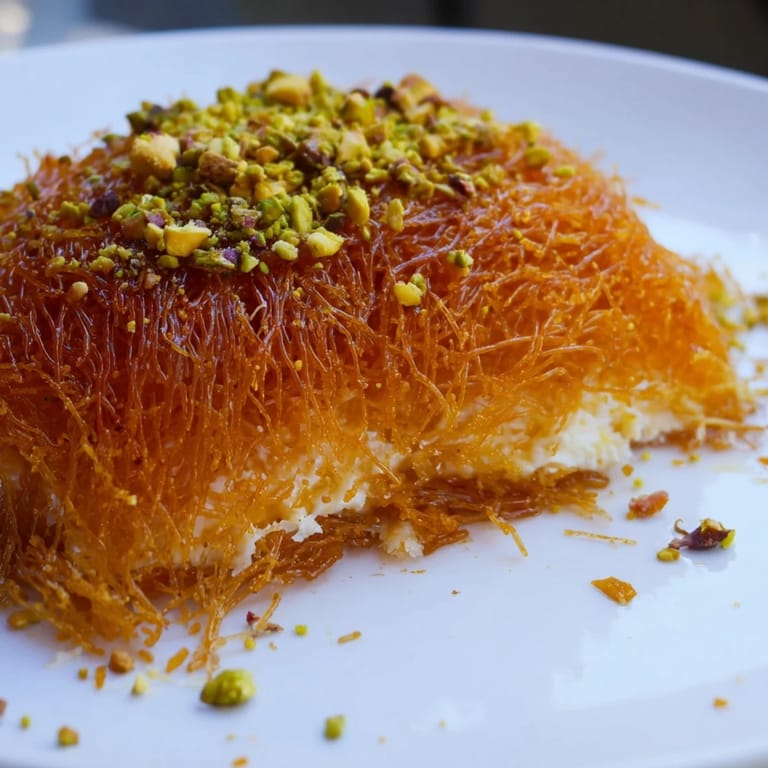
- This is where the magic happens and where I hold my breath every time. Let the knafeh cool for just 2–3 minutes (you want it warm but not scalding), then invert it onto a serving platter in one confident motion. If you hesitate, it might stick, so commit to the flip.
- Syrup, garnish, and finish:
- Pour about half the cooled syrup evenly over the hot knafeh—it will soak in quickly. Sprinkle the pistachios generously over the top, drizzle with honey if you'd like, and serve warm with extra syrup on the side for people who want more.
 Save
Save Years later, I realize knafeh taught me something unexpected: that the most impressive dishes often require patience in unglamorous places. Nobody sees you changing the water for the cheese or standing at the stove watching the syrup thicken. But they taste the difference it makes, and that's what stays with them.
The Magic of Cheese Choice
Akawi cheese is traditional for a reason—when it melts, it gets that signature stretchy, almost squeaky texture that makes every bite memorable. If you're using mozzarella instead, choose low-moisture over fresh so it doesn't release water and turn your filling soupy. I learned this the hard way when I grabbed the wrong mozzarella once and ended up with a puddle.
Building Crispy Layers
The kataifi pastry is fragile and forgiving at the same time. Those shredded strands need butter to crisp up properly, but they don't need to be packed down so tightly that they become dense. Think of them as individual little threads that should stay somewhat loose—that's what gives you that shatter-when-you-bite-it texture that makes knafeh special.
Serving and Storing
Knafeh is best served within a few hours of baking, while it still has that contrast between crispy pastry and creamy cheese. If you need to make it ahead, you can assemble and bake it in the morning and reheat gently before serving. Leftover syrup keeps in the fridge for weeks and is incredible drizzled over ice cream or yogurt.
- If you want extra crunch, broil the finished knafeh for just 1–2 minutes under a hot broiler—stand right there and watch it so it doesn't burn.
- Serve with strong Turkish coffee or fresh mint tea to cut through the sweetness and cleanse your palate between bites.
- Don't skip the pistachios—they're not just decoration, they add a sophisticated nuttiness and beautiful color that makes the whole dessert feel special.
 Save
Save Every time I make this, I'm reminded that some recipes are worth the small rituals they require. Knafeh asks for patience and attention, and in return, it gives you something that tastes like celebration tastes like home.
Recipe Help & FAQs
- → What cheese is ideal for this dish?
Traditionally, Akawi cheese is used for its mild, stretchy texture. Unsalted mozzarella can be a convenient alternative, combined with ricotta for creaminess.
- → How is the kataifi pastry prepared?
The shredded phyllo is gently separated and coated thoroughly with melted butter to ensure an even, crisp bake.
- → What flavors are infused in the syrup?
The syrup is sweetened with sugar and enhanced by fragrant orange blossom and rose waters, with a touch of lemon juice for brightness.
- → Can this dessert be served ahead of time?
It’s best enjoyed immediately while warm to maintain its creamy texture and crisp topping.
- → What are common serving suggestions?
Pair it with Turkish coffee or a refreshing mint tea to complement its rich, sweet flavors.
- → How can the crunchy top layer be enhanced?
For extra crispness, broil the top for 1–2 minutes after baking but watch closely to avoid burning.