 Save
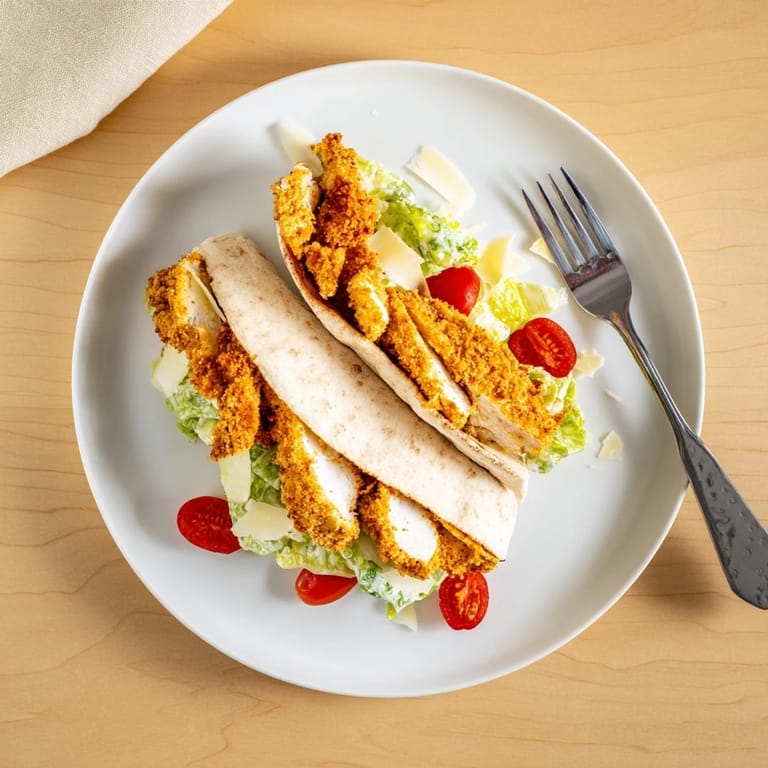
Save The first time I made these chicken Caesar pitas was on a Tuesday night when my fridge had random ingredients and I needed something that felt like a treat but came together fast. My roommate walked in mid-chicken-frying and immediately abandoned her plans for a salad dinner. Now whenever I make that herbed breading mixture, the aroma of oregano and garlic fills the whole apartment, and people start appearing in the kitchen doorway, asking what smells so incredible.
Last summer I made these for a backyard hangout, and my friend who usually picks off all breading from fried chicken actually went back for seconds. Something about the Caesar dressing soaking slightly into the pita, mixing with those crunchy chicken edges, just hits differently. Ive started keeping pita bread in the freezer specifically for those nights when we need dinner in under 30 minutes but still want something satisfying.
Ingredients
- 2 large boneless skinless chicken breasts: Slice these horizontally to create thinner cutlets that cook through evenly and fit perfectly inside pita pockets
- 1 cup panko breadcrumbs: These Japanese breadcrumbs create an exceptionally light and crispy crust that traditional breadcrumbs cannot match
- 1/2 cup grated Parmesan cheese: Adds salty umami depth directly into the breading mixture for extra flavor in every bite
- 1 tablespoon chopped fresh parsley: Brings bright fresh color and herbal notes that balance the rich elements
- 1 teaspoon dried oregano: Classic Mediterranean herb that pairs naturally with both chicken and Caesar flavors
- 1 teaspoon dried basil: Sweet and peppery notes that complement the parsley and oregano beautifully
- 1/2 teaspoon garlic powder: Distributes garlic flavor evenly throughout the coating without any burnt bits
- 1/2 teaspoon salt: Essential seasoning that also helps the coating adhere to the chicken
- 1/4 teaspoon black pepper: Adds gentle heat that cuts through the rich cheese and dressing
- 1/2 cup all-purpose flour: First layer of the breading station that helps the egg wash stick to the chicken
- 2 large eggs: Beaten with milk to create the perfect adhesive layer for the panko coating
- 2 tablespoons milk: Thins the eggs slightly for an easier dipping consistency
- 3 tablespoons olive oil: Provides the perfect medium for pan-frying without overpowering the other flavors
- 4 cups chopped romaine lettuce: Crisp romaine holds up beautifully against the warm chicken and dressing
- 1/3 cup Caesar dressing: The creamy tangy element that ties everything together with classic Caesar flavor
- 1/4 cup shaved Parmesan cheese: Different from the grated cheese in the breading this adds salty pockets throughout the salad
- 1/2 cup cherry tomatoes halved: Optional but adds bright acidic pops and beautiful color contrast
- 4 large pita breads: Look for pockets that will open easily without tearing
- Lemon wedges: Fresh squeeze over the finished pitas brightens all the rich elements
Tired of Takeout? 🥡
Get 10 meals you can make faster than delivery arrives. Seriously.
One email. No spam. Unsubscribe anytime.
Instructions
- Prep the chicken cutlets:
- Slice each chicken breast horizontally to create two thinner pieces so you have four cutlets total that will cook quickly and evenly.
- Set up your breading station:
- Arrange three shallow bowls with flour in the first whisked eggs and milk in the second and the panko Parmesan mixture in the third for easy assembly line dipping.
- Coat the chicken:
- Dredge each cutlet in flour shake off excess dip in egg mixture then press firmly into the panko mixture ensuring complete coverage.
- Fry to golden perfection:
- Heat olive oil in a large skillet over medium heat and cook chicken 3 to 4 minutes per side until deep golden brown and cooked through to 165 degrees.
- Warm the pitas:
- Quickly heat pita breads in a dry skillet or warm oven for 1 to 2 minutes so they become pliable and easier to fill without cracking.
- Assemble the Caesar salad:
- Toss romaine lettuce with Caesar dressing and shaved Parmesan in a large bowl until every leaf is lightly coated.
- Slice the chicken:
- Cut the crispy chicken cutlets into strips that will tuck easily into the pita pockets while maintaining that crunch.
- Build your pitas:
- Cut each pita in half to create pockets then stuff with Caesar salad and top with chicken strips.
- Serve immediately:
- Offer lemon wedges on the side for guests who want an extra bright finish to their meal.
 Save
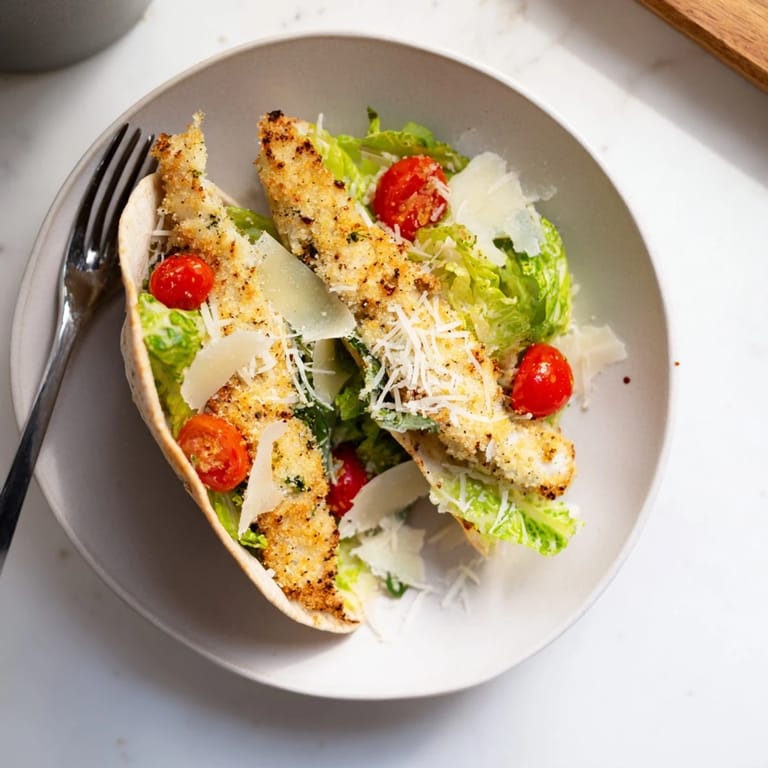
Save These became my go-to dinner when my cousin visited last fall and she requested them three nights in a row. Something about that combination of hot crispy chicken and cool creamy salad makes people feel taken care of. I've started making double batches of the herbed breading mixture to keep in the freezer because it transforms any weeknight protein into something special.
Getting That Perfect Crunch
The secret to restaurant-style crispy chicken at home is pressing the panko mixture firmly onto the cutlets rather than just sprinkling it on. I learned this technique after watching my grandmother make breaded pork chops her entire life. Use the back of a spoon or your fingers to really press those breadcrumbs into the egg wash and you will notice the difference immediately.
Building Better Pitas
Not all pita breads are created equal when it comes to stuffing them full of ingredients. I always gently warm each pita and then carefully open the pocket with my fingers to check for any weak spots that might tear. Sometimes I even use kitchen shears to cut a wider opening if I know I am piling in lots of salad and chicken.
Make It Your Own
This recipe welcomes whatever you have in your crisper drawer or pantry. I have made countless variations based on what needs using up and they all work beautifully.
- Swap the Caesar dressing for ranch or blue cheese if that is what your family prefers
- Add sliced avocado or crispy bacon inside the pita for extra richness and texture
- Try different herbs in the coating like thyme or rosemary depending on the season
 Save
Save These pitas have become one of those meals that makes regular Tuesday nights feel like a small celebration. Hope they become a comfort food favorite in your kitchen too.
Recipe Help & FAQs
- → Can I make the chicken ahead of time?
Yes, you can bread the chicken cutlets up to 4 hours ahead and refrigerate. Cook them fresh just before serving for the crispiest results. Cooked chicken can be refrigerated for 3 days and reheated gently.
- → What's the best way to keep pitas warm?
Warm pitas in a dry skillet over medium heat for 1-2 minutes per side until soft and pliable. Alternatively, wrap them in a clean kitchen towel after warming to retain heat while you finish the other components.
- → How do I achieve maximum crispiness on the chicken?
Ensure your oil is hot before adding cutlets, don't overcrowd the skillet, and avoid flipping too early. Pat chicken dry before breading, and maintain medium heat to cook through without burning the coating.
- → Can I substitute the Caesar dressing?
Absolutely. Greek yogurt-based dressings, ranch, or garlic aioli work well. For a lighter option, toss the salad with olive oil, lemon juice, garlic, and Parmesan instead of traditional dressing.
- → What vegetables can I add to the filling?
Cherry tomatoes, cucumber slices, red onion, bell peppers, or avocado all complement the herbed chicken well. Keep vegetables thinly sliced and add them just before serving to prevent the pitas from becoming soggy.
- → Is this suitable for meal prep?
Cook and store chicken and salad separately for up to 3 days. Assemble pitas fresh when ready to eat. Keep dressing separate until final assembly to maintain crispy chicken and fresh greens.